2-Step Verification adds an extra layer of security to your Gmail account.
This guide will show you how to set it up.
Step 1: Sign in to Gmail
Open your web browser and go to mail.google.com.
Step 2: Access Security Settings
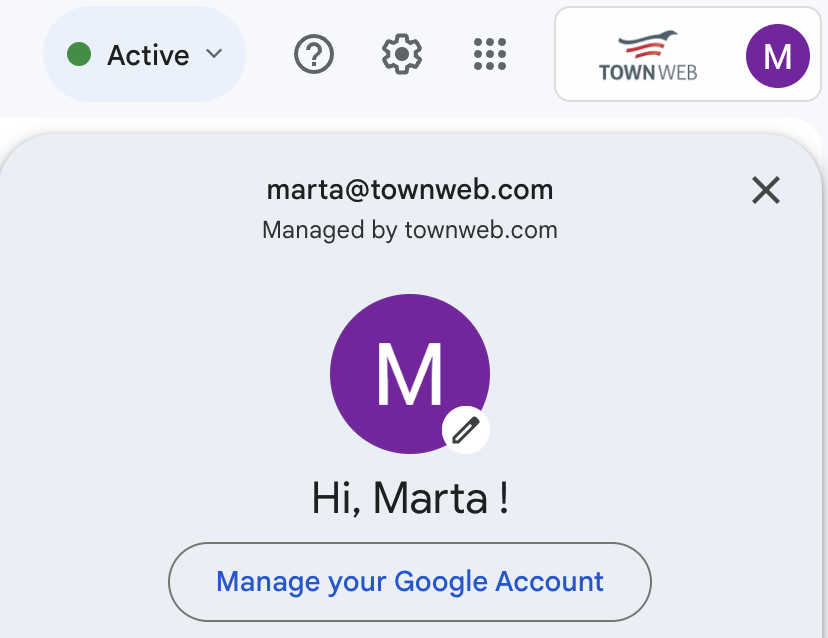
Click your profile picture in the top right corner, then select “Manage your Google Account.”
Step 3: Navigate to Security
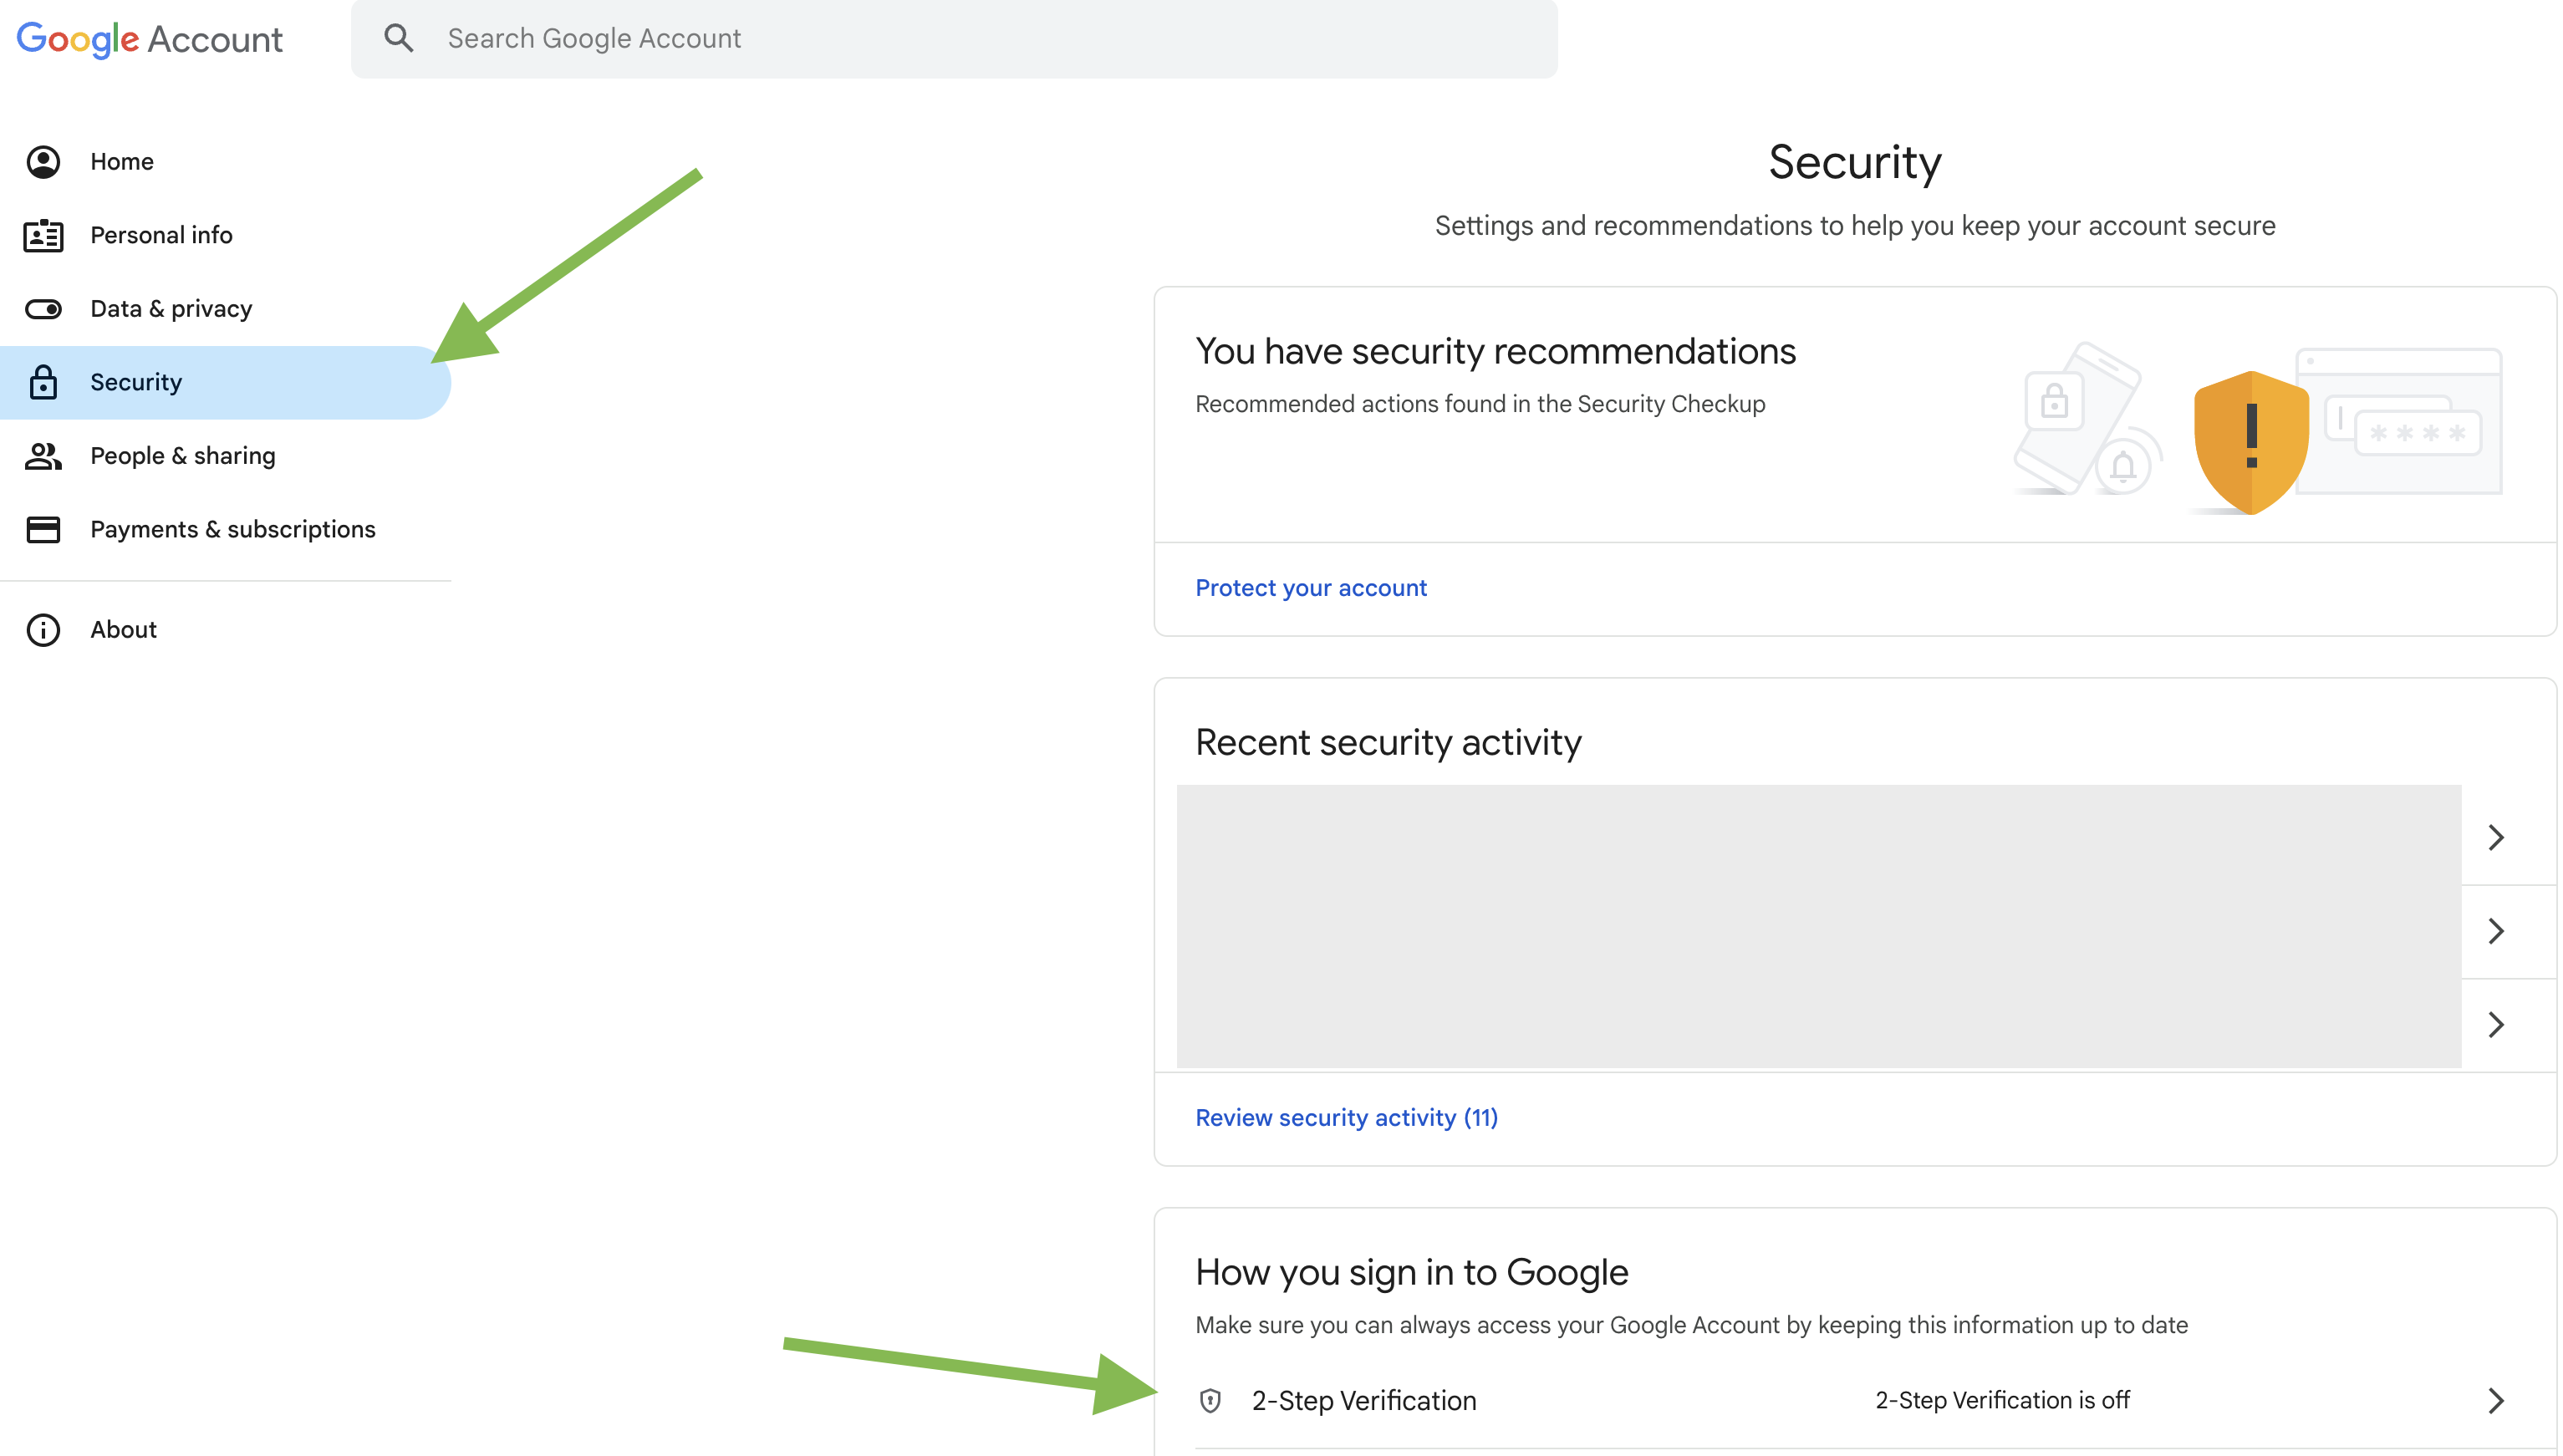
On the left sidebar, click “Security.”
Step 4: 2-Step Verification
Scroll down to the “Signing in to Google” section and find “2-Step Verification.” Click on it.
Step 5: Start Setup
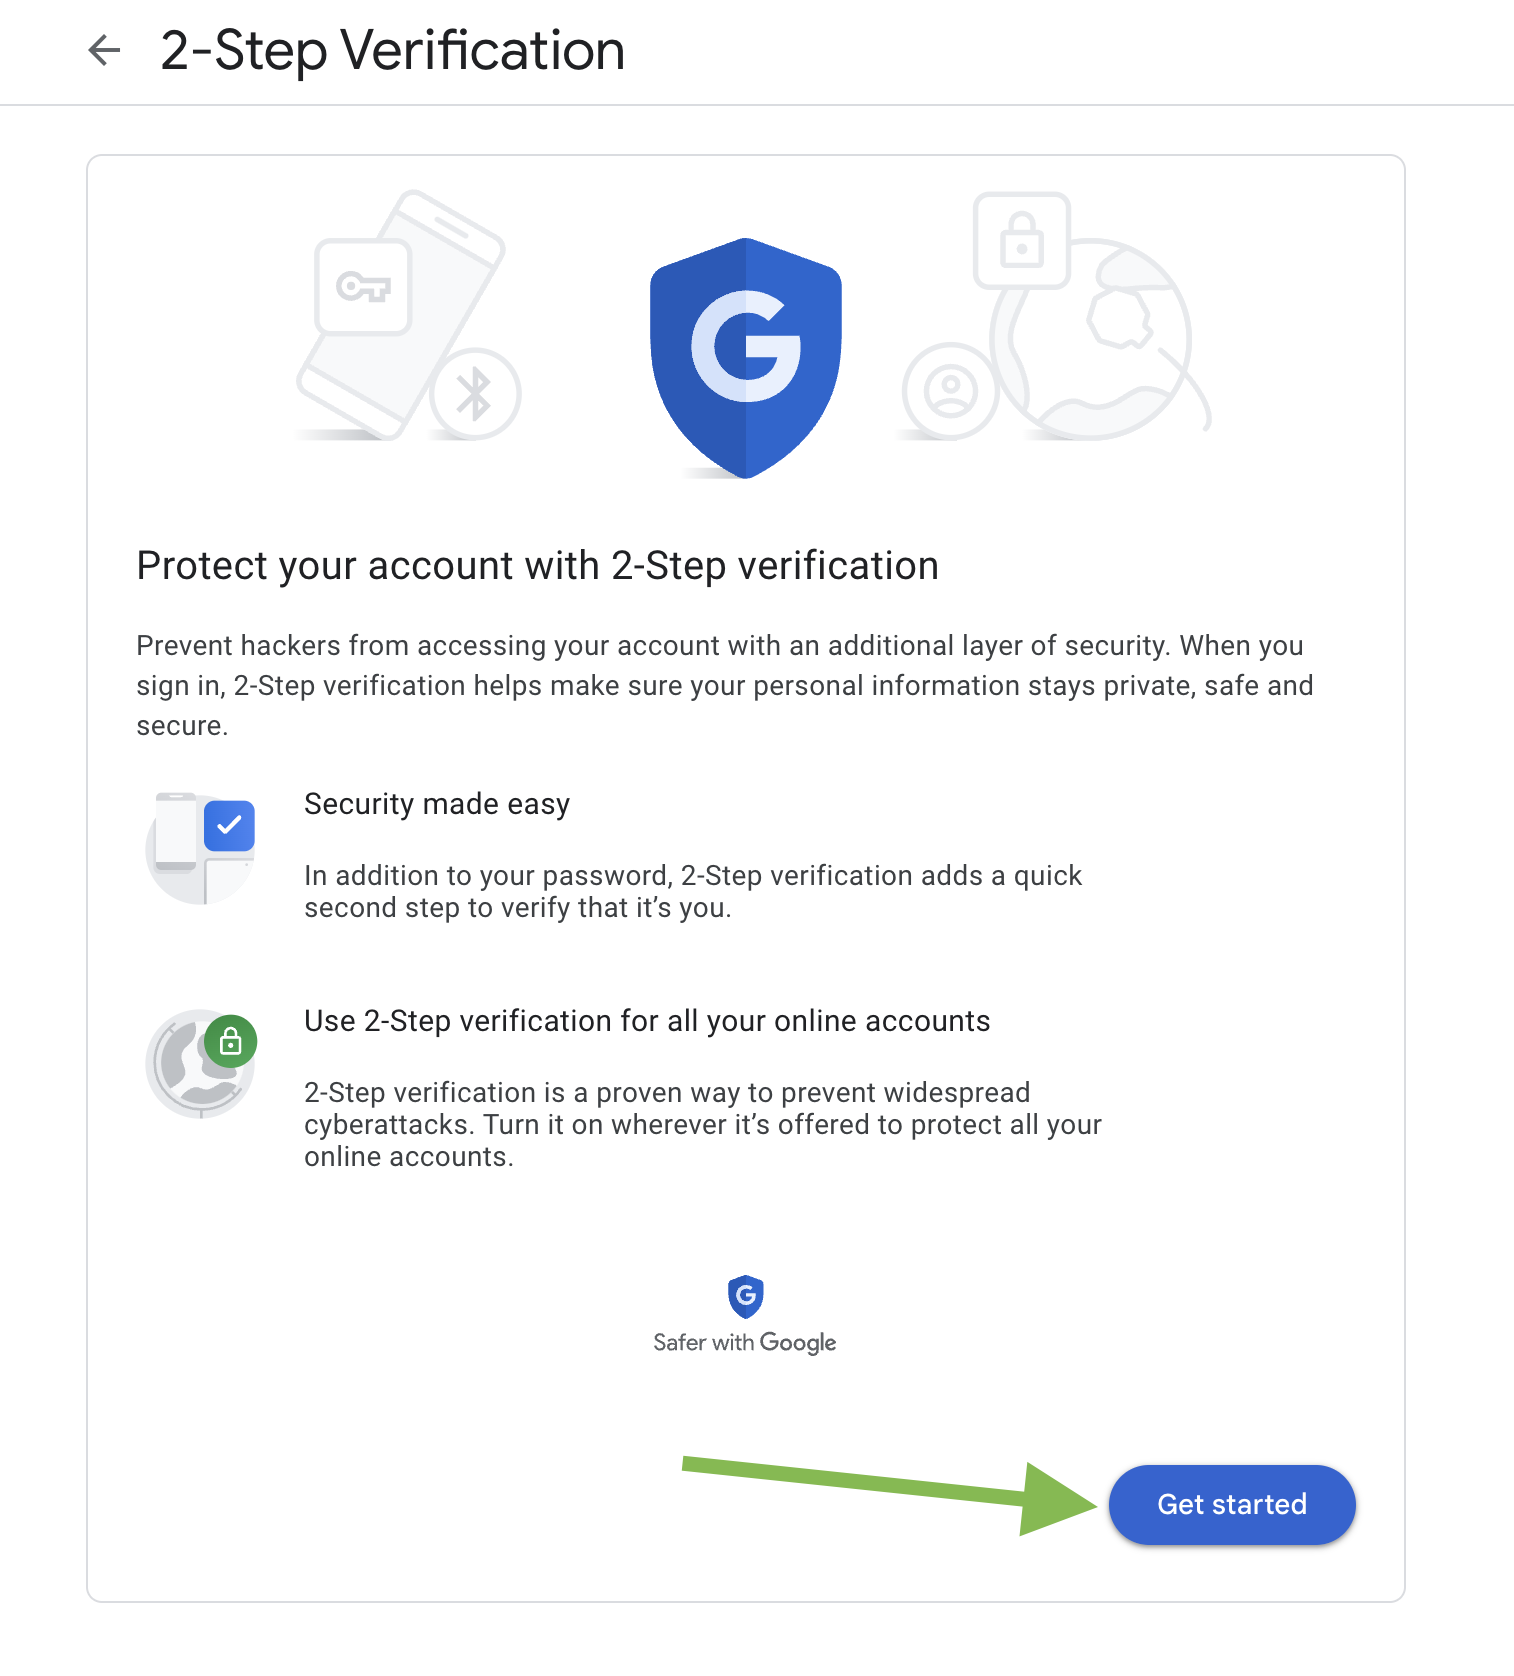
Click the “Get started” button to begin the setup process.
Step 6: Verify Your Identity
Google will ask you to sign in again for security reasons. Enter your Gmail password and click “Next.”
Step 7: Set Up Your Phone
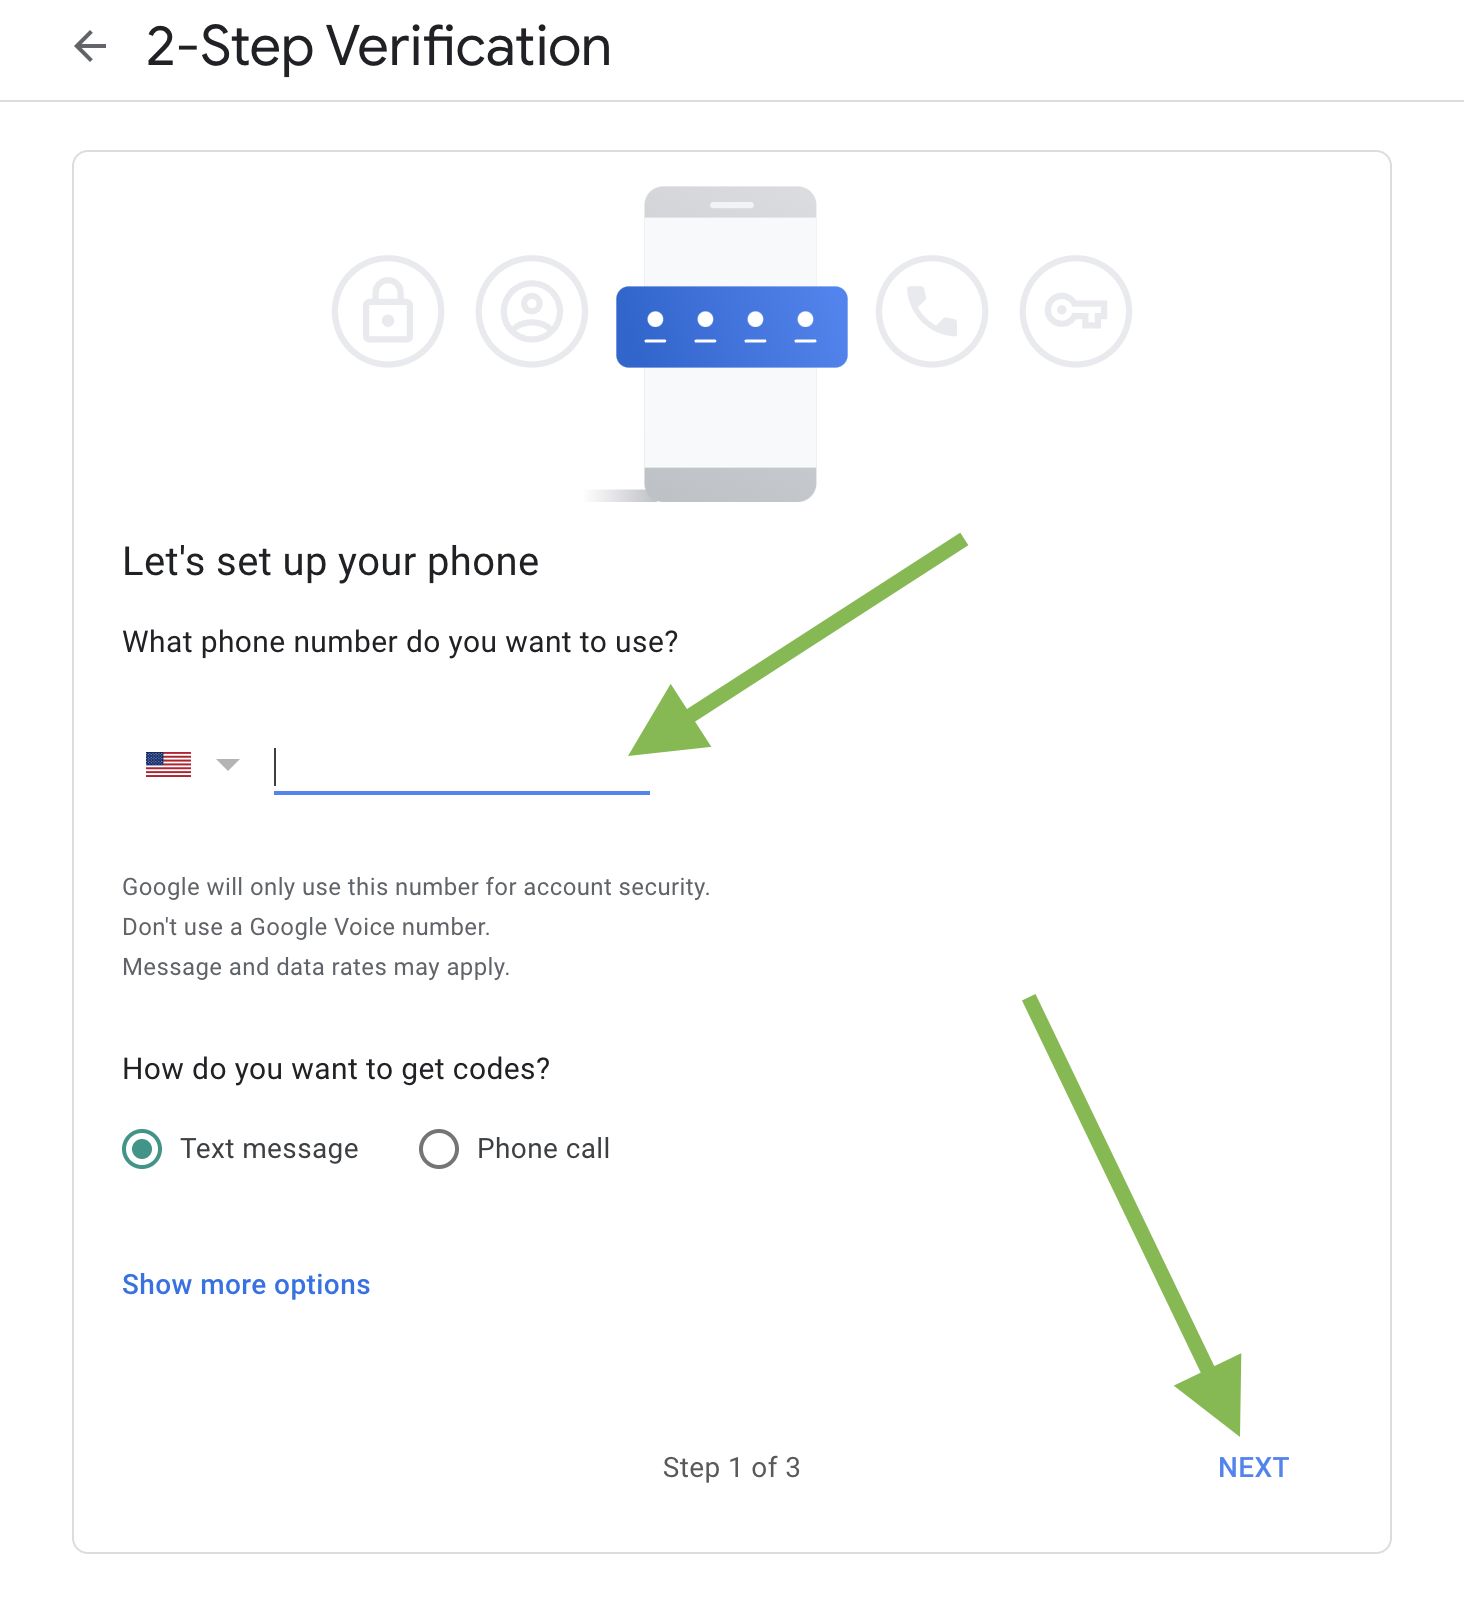
Select “Text message” or “Phone call” as your second verification method. Google will send a code to your phone as a text message or phone call to verify your identity. Enter the code to continue.
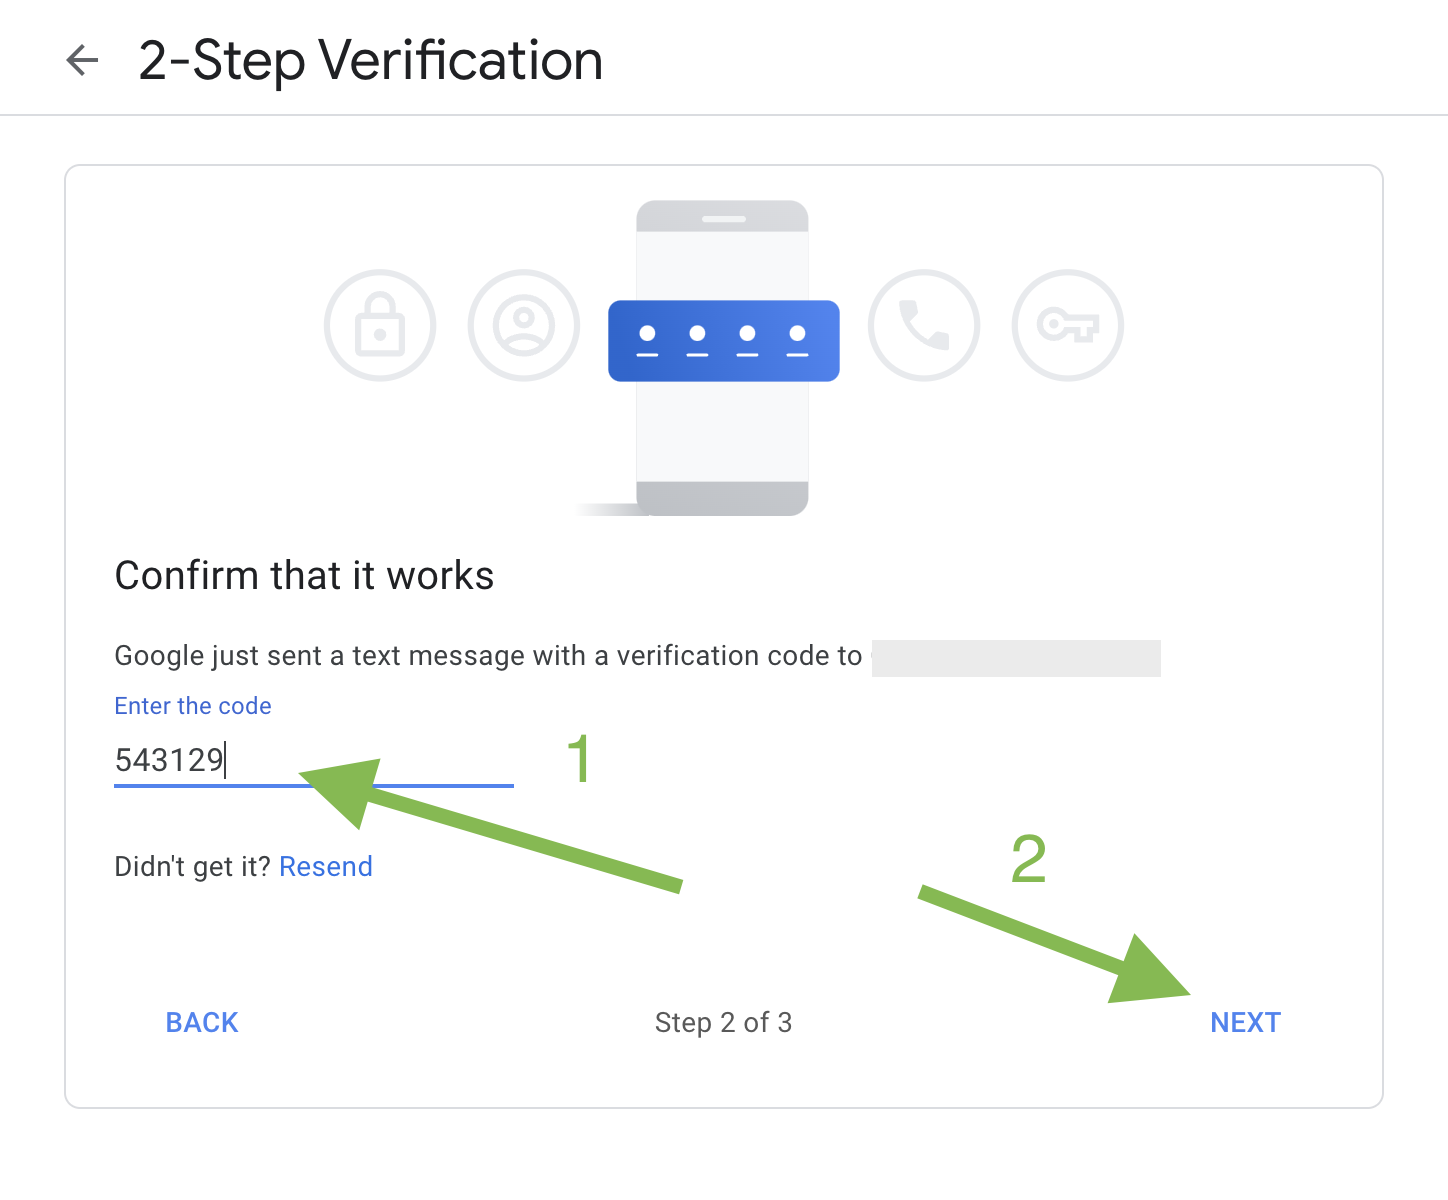
Step 8: Turn on 2-Step Verification
Click the “Turn on” button to enable 2-Step Verification.
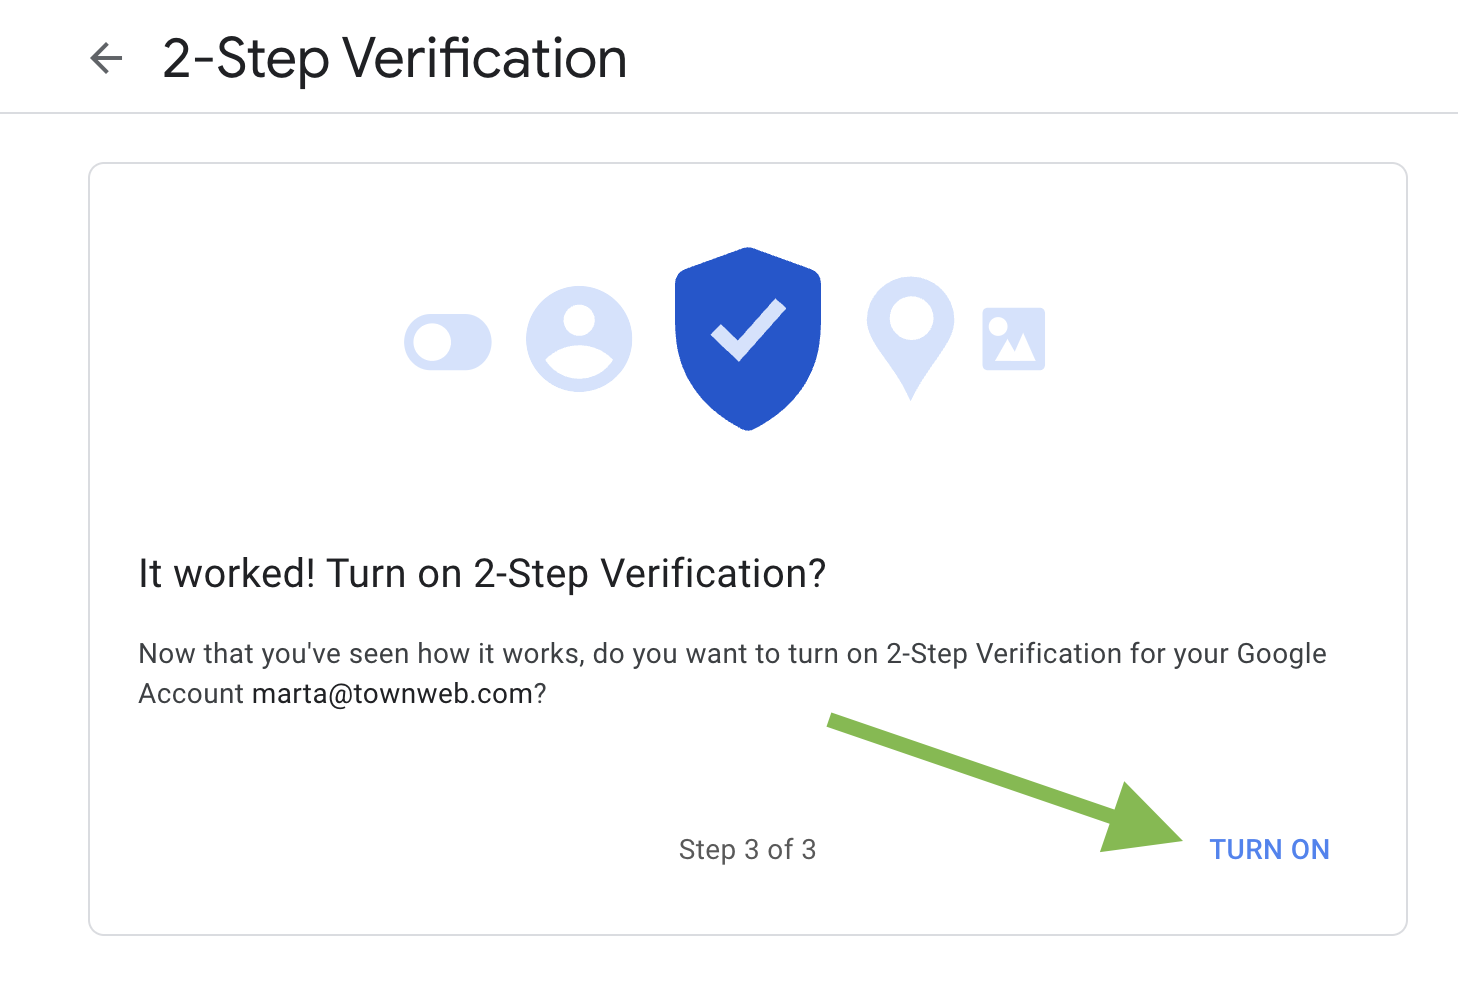
Your Gmail account is now more secure with 2-Step Verification. Whenever you sign in, Google will send a code to your phone for an extra layer of protection.
2-Step Verification (2SV) offers an added layer of security by requiring more than just a password to access your account.
In addition to something you know, which is your password, it also involves something you have, like a physical key or access code.
This means that even if someone somehow gets hold of your password, they won’t be able to access your account without this extra piece of information.
